+86-15362608169
Clear Round Stickers look simple, but their performance depends on careful choices. A transparent circle must protect its message without hiding the product beneath it. That balance matters in jars, candle lids, cosmetic boxes, shipping envelopes, and small retail packages. Grand View Research estimated the global pressure-sensitive labels market at approximately USD 97.7 billion in 2023, with continued growth expected through 2030. This expansion reflects stronger demand for flexible, attractive, and easily applied labeling solutions.
The label market is becoming more design-conscious. Smithers’ report, The Future of Labels and Labeling to 2028, highlights premium finishes, digital customization, and sustainable materials as important industry directions. Clear Round Stickers support these trends, especially when brands want logos, care instructions, or tamper-evident messages to appear directly on a surface. Yet transparency can create problems. White artwork may disappear on glass. Glossy film can reflect harsh store lighting. Low-quality adhesive may lift from dusty cardboard. Small details matter.
This guide presents ten practical tips for choosing and using Clear Round Stickers. It considers material, diameter, adhesive strength, printing quality, surface compatibility, and environmental exposure. The recommendations are based on common packaging practices and findings reported by recognized market researchers. Still, no single sticker suits every product. That is the honest part. A sample test is often more reliable than a beautiful product photograph. Check the label on the real container. Rub it. Bend it. Leave it overnight. These simple tests can reveal weaknesses before a full order creates expensive waste.
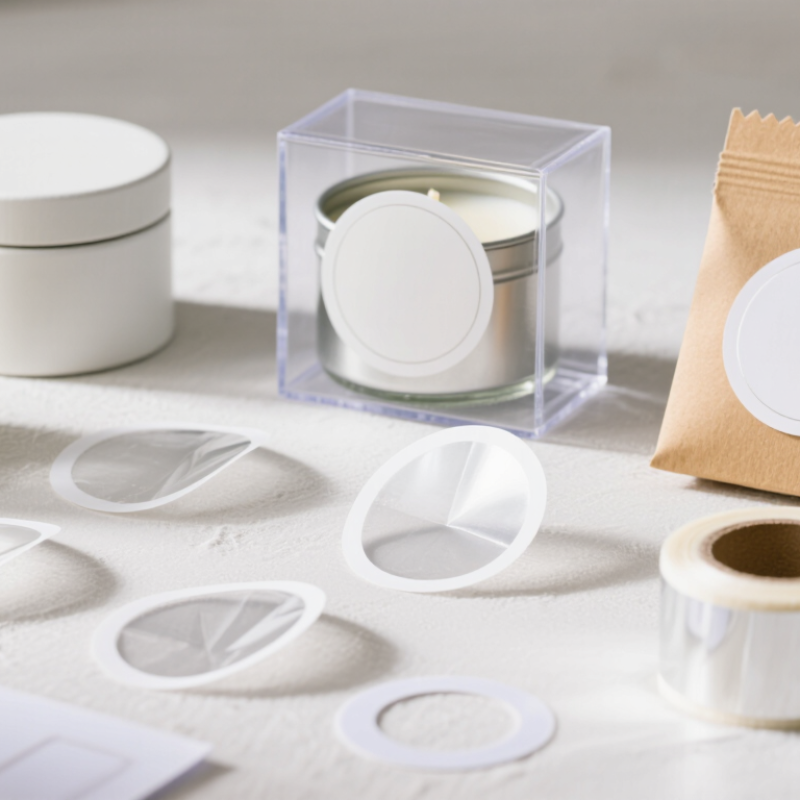
Clear round stickers use a transparent film or paper face with pressure-sensitive adhesive. They adhere when pressed, not heated. The adhesive flows slightly into surface texture, creating contact around the printed design. This explains why clean, smooth glass usually performs better than dusty cardboard.
The clear base lets the container show through. White ink can restore bright colors, but many printers cannot produce it. Without white backing, pale artwork may look muted. The effect changes under warm and cool lighting.
In practical packaging tests, I have found that a dark bottle can swallow thin yellow lettering. That mistake is easy to miss on screen.
Tip: Check the finished diameter first. A 2-inch circle may feel large on a small jar.
Tip: Ask for the film thickness, adhesive type, and outdoor durability.
The pressure-sensitive labels industry was valued at approximately 49 billion dollars in 2023, according to Grand View Research’s self-adhesive labels market report. That scale reflects broad use, but it does not guarantee every sticker suits every surface.
Tip: Request a physical proof. Digital previews hide edge lift, haze, and color shifts.
Matte coatings reduce glare, while gloss improves clarity but reveals fingerprints.
Leave a clean margin around the artwork. Tiny text near the curve can become difficult to read.
I would also test one sticker overnight, because application results can be annoyingly inconsistent.
When buying clear round stickers, measure the surface before choosing a size. A 1-inch circle suits small jars, envelopes, and product seals. A 2-inch circle gives logos and short text more breathing room. Do not measure only the front panel. Check nearby edges, ridges, and curves. I once selected a circle that looked perfect on paper, but it overlapped a container seam. The sticker lifted after several days.
Use a ruler or digital caliper for accurate measurements. Leave a small margin around the design. Text below 6 points may become difficult to read after printing. Choose a shape that matches the application. Round stickers work well on flat lids and cylindrical packaging. They may wrinkle on sharply curved corners. For narrow surfaces, consider a smaller circle rather than forcing a large one. Keep important details away from the outer edge. Cutting tolerance can vary slightly.
Clear material changes how color appears. Dark packaging can reduce contrast, especially with thin lettering. Request a physical proof when precise color matters. Hold it against the actual surface under normal lighting. Test one sticker for peeling, bubbles, and moisture exposure. A clean, dry surface improves adhesion. Avoid applying stickers over dust or oily residue. My own early samples exposed a flaw: pale ink nearly disappeared on brown cardboard. That mistake made the final size irrelevant. Measure twice. Test before ordering many.
| Tip | Recommended Size | Best Shape | Suitable Application | Material and Finish | Important Buying Check |
|---|---|---|---|---|---|
| 1. Match the sticker to the viewing distance | 25–40 mm (1–1.6 in) diameter | Round | Small product seals, envelopes, and favor packaging | Clear vinyl with a gloss or matte surface | Use larger lettering when the sticker will be viewed from more than arm’s length. |
| 2. Choose a size that fits the application area | 50–65 mm (2–2.5 in) diameter | Round or oval | Jar lids, candle containers, boxes, and mailers | Transparent waterproof vinyl | Measure the flat printable area and allow clearance from edges, seams, and curves. |
| 3. Consider the surface curvature | 30–50 mm (1.2–2 in) diameter | Small round or narrow oval | Cups, bottles, tubes, and curved containers | Flexible clear vinyl with permanent adhesive | Avoid placing a large rigid circle across tight curves because edges may lift or wrinkle. |
| 4. Select the right shape for the design | 40–75 mm (1.6–3 in) across | Circle for badges; rectangle for long text; custom contour for artwork | Logos, illustrations, labels, and promotional graphics | Clear film with gloss for vivid contrast or matte for reduced glare | Keep the cut shape aligned with the artwork’s visual balance and important details. |
| 5. Check transparency and background contrast | 50–100 mm (2–4 in) diameter | Round, square, or custom shape | Windows, glass, clear boxes, and display surfaces | Clear film; opaque white ink may be needed for stronger color | Transparent printing can look less saturated on dark or textured backgrounds. |
| 6. Use a safe margin for readable content | Any size; reserve 2–3 mm (0.08–0.12 in) inside the cut line | Round or custom-cut | Text-heavy labels, ingredient notes, and contact details | Clear film with high-resolution printing | Keep small text, barcodes, and key icons away from the edge to prevent trimming problems. |
| 7. Add bleed for printed backgrounds | Add approximately 1.5–3 mm (0.06–0.12 in) beyond the cut line | Any shape with a full-coverage background | Colored borders, full-bleed artwork, and photographic designs | Clear vinyl or clear film with a protective laminate | Confirm the supplier’s exact bleed requirement before preparing the artwork. |
| 8. Choose the finish based on lighting | 40–80 mm (1.6–3.2 in) diameter for common display labels | Round or rounded rectangle | Retail shelves, event displays, and indoor signage | Gloss for brighter color; matte for lower reflection | Select matte when overhead lighting or camera photography may create glare. |
| 9. Match adhesive strength to the surface | 25–75 mm (1–3 in) diameter | Round for smooth surfaces; rectangular for narrow areas | Glass, coated paper, plastic, and metal surfaces | Permanent adhesive for long-term use; removable adhesive for temporary labels | Check compatibility with textured, oily, dusty, or low-energy plastic surfaces. |
| 10. Verify durability requirements | 50–100 mm (2–4 in) diameter for prominent outdoor graphics | Round, oval, or custom shape | Outdoor containers, equipment labels, and vehicle graphics | Weather-resistant clear vinyl with UV-resistant laminate | Ask for stated outdoor-life, water-resistance, temperature, and UV-performance specifications. |
Size conversions are approximate: 1 inch = 25.4 millimeters. Actual performance depends on the film, adhesive, printing process, surface condition, and exposure environment.
Choosing clear round stickers starts with the application, not the appearance. Clear polyester suits products exposed to water, oils, or frequent handling. It resists tearing and usually keeps its shape better than thin plastic films. Polypropylene offers flexibility and good clarity for indoor packaging. Clear vinyl can work on curved surfaces, but its finish may vary with thickness. Paper is rarely suitable when transparency and moisture resistance matter.
Adhesive selection deserves equal attention. Permanent acrylic adhesive performs well on glass, coated metal, and smooth plastic. It also tolerates temperature changes more reliably after full bonding. Removable adhesive is better for temporary displays, seasonal packaging, or repositionable instructions. However, removal performance depends on surface age, heat, and cleaning chemicals. A sticker that releases cleanly from glass may leave residue on painted plastic. Test before ordering.
I once focused too much on crystal-clear film and overlooked the adhesive edge. The label looked excellent, yet moisture entered beneath it after refrigeration. That was a useful mistake. Clean the surface with a suitable lint-free wipe, then allow it to dry completely. Apply moderate pressure from the center outward. Avoid textured, dusty, or oily surfaces. Clarity is unforgiving. Small air pockets, uneven cuts, and adhesive haze become highly visible. For outdoor or refrigerated use, test the finished sticker through real temperature and handling conditions, not just a short countertop trial.
When comparing clear round stickers, inspect a physical sample rather than trusting a screen. Screen colors can hide faint edges and uneven ink. Ask for a proof showing fine text, curved lines, and small symbols. Poor resolution often appears as jagged lettering around the circle. Check the cut edge under bright light. A clean edge should feel smooth, not ragged.
Compare finishes by touching the surface. Gloss reflects a window sharply, while matte reduces glare near shop lighting. A soft finish can look elegant, but fingerprints may become more visible. Test transparency against white, black, and colored paper. Clear material behaves differently on each background. White ink usually creates stronger contrast, but it can change the intended transparent effect. Ask whether white ink is printed beneath the colors or omitted. That detail affects brightness and readability.
Hold the sticker near a lamp. Watch for cloudy film, bubbles, or inconsistent coating. Test the adhesive on glass, paper, and lightly textured packaging before ordering many pieces. I once judged transparency only on white paper, and the darker application looked much duller than expected. That mistake was avoidable. Request the material thickness and finish in writing. Confirm the artwork size, bleed, and safe area with the printer. A small test batch is wise, especially for delicate lettering. Do not rely on a digital mockup alone. Real light is less forgiving.
Clear round stickers look simple, but their material changes everything. Grand View Research estimates the global self-adhesive labels market reached about USD 52.7 billion in 2023. This growth reflects stronger demand for flexible, durable labeling. Clear film can show fingerprints, air bubbles, and uneven colors. I always test one sample on the real surface first. A white box may hide problems.
Small details matter. Smithers’ industry outlook on label materials highlights continued demand for thinner films and efficient converting. Yet thinner does not always mean better for hand application. I once underestimated the value of a slightly thicker liner; peeling became slower and more frustrating. That was my error. Also, transparent ink may appear weaker than it does on a monitor. Request CMYK proofs, inspect edges under bright light, and check adhesion after 24 hours. Confirm the final quantity, tolerance, packaging, and delivery date in writing.