How to Create Vinyl Cut Stickers that Stand Out?
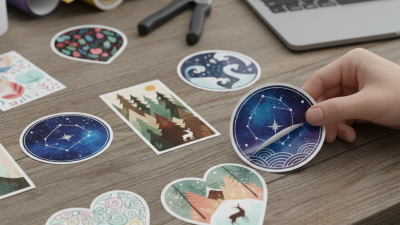
Creating Vinyl Cut Stickers that truly stand out requires careful thought and creativity. These stickers are popular for personalizing items like laptops, water bottles, and walls. However, many struggle to make their designs unique.
The key lies in understanding the tools and materials you’ll use. Quality vinyl is essential, as it affects durability and appearance. Choosing the right cutter also plays a crucial role. Many users find themselves frustrated by technical limitations or unexpected results. It's often a learning curve.
Experimentation is also vital in sticker creation. Not every design will be a hit. Some may not adhere well or lose their appeal over time. Reflecting on these outcomes can guide future projects. With practice, your Vinyl Cut Stickers can evolve into eye-catching pieces that attract attention.
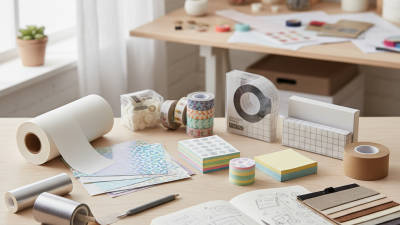
Choosing the Right Materials for Vinyl Cut Stickers
When creating vinyl cut stickers, the choice of materials is crucial. The right vinyl can make or break your design. Common options include
glossy,
matte,
and transparent vinyl.
Glossy finishes enhance colors, making them pop. Matte vinyl, on the other hand, gives stickers a more sophisticated look.
Transparent vinyl allows for creative layering, adding depth to your designs.
Tips: Always test your materials. Create samples to see how different vinyls affect your final product. Don’t forget to consider the intended location for your sticker.
Outdoor stickers need durable, weather-resistant vinyl. Indoor stickers can be made from lighter materials.
Sometimes, even the best materials can fail to deliver the expected outcome. Factors like
humidity
and
temperature
can affect adhesion. You may find that certain surfaces do not respond well to specific types of vinyl.
Keep track of these experiences, as they can guide your future projects. Creating a comprehensive log of your material choices helps avoid repeated mistakes.
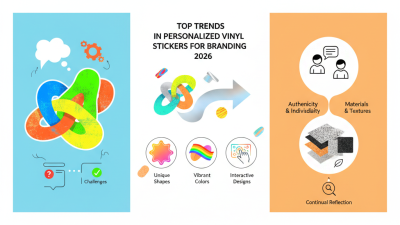
Designing Eye-Catching Graphics for Your Stickers
Creating visually striking graphics for vinyl cut stickers requires a blend of creativity and attention to detail. Choose bold colors that contrast well with each other. Bright hues can catch the eye and make a statement. Consider the shapes you want to use; geometric figures invite attention. Sometimes, less is more. Simple designs often resonate better with viewers.
Focus on fonts that are easy to read. Cursive and elaborate fonts may look attractive, but readability should be a priority. Experiment with layering different elements to add depth. You may find that some combinations work better than others. Remember, trial and error can lead to unexpected discoveries. Don't hesitate to seek feedback from others; their perspective can highlight areas for improvement.
Imagery matters, too. Use motifs or symbols that reflect the theme of your sticker. Ensure that these elements blend well with your chosen colors and shapes. Every aspect of your design should come together cohesively to create a unique sticker. Embrace the learning process, as even minor mistakes can inspire fresh ideas. Ultimately, a standout sticker is one that tells a story while being visually appealing.
How to Create Vinyl Cut Stickers that Stand Out? - Designing Eye-Catching Graphics for Your Stickers
| Design Element |
Description |
Example |
| Color Scheme |
Choose bold and contrasting colors to capture attention. |
Bright Red and Yellow |
| Typography |
Use readable, stylish fonts that convey the message clearly. |
Bold Sans-Serif for headings |
| Imagery |
Incorporate relevant images or icons that support the message. |
Vector graphic of an animal |
| Size |
Consider the size that will best display your design without losing detail. |
3" x 3" sticker |
| Finish |
Glossy or Matte finish can change the appearance dramatically. |
Glossy for vibrant colors |
Preparing Your Design for Cutting and Printing
Preparing your design for cutting and printing vinyl cut stickers involves several important steps. The design should be created in vector format to ensure clean edges and scalability. According to a report by the Sign Research Foundation, 45% of consumers prefer bright colors and clear text on signage. This insight can help in selecting colors that truly pop. Utilizing tools like Adobe Illustrator can streamline the design process.
When choosing your vinyl, consider the material’s durability. Vinyl that is rated for outdoor use typically lasts 5-7 years, according to a data analysis from the Vinyl Institute. This is crucial for stickers intended for car decals or outdoor signage. Additionally, setting the correct blade depth and speed on your cutting machine can greatly affect the final product. Many novice designers
overlook these settings, resulting in poor-quality cuts.
Testing your design with smaller samples can also be worthwhile. This helps in adjusting colors and details before committing to a larger batch. Many designers find that their initial designs need tweaks after printing. The process is iterative and reflects a learning curve. Striving for perfection often leads to valuable insights into the design and cutting process.
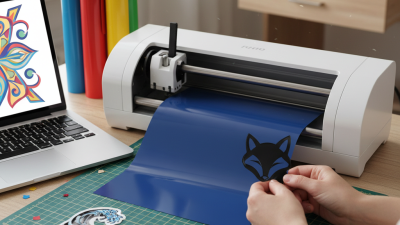
Using the Right Cutting Tools and Techniques
Creating vinyl cut stickers that truly stand out can be a fulfilling project. Choosing the right cutting tools is a critical first step. A good vinyl cutter, whether it’s a small desktop machine or a larger commercial model, can make a significant difference. Understanding how to set up your cutter correctly is crucial. The blade settings should match the vinyl’s thickness. A poorly adjusted blade can lead to uneven edges or even ruin your design.
Technique matters just as much as the tools. Proper weeding is an art in itself. It involves removing excess vinyl from your design, which can be tedious but essential for a clean finish. Using a fine-tipped weeding tool can help achieve precision. Alignment is another area where mistakes can happen. If your design isn’t centered on the backing, the result can look sloppy. Taking time to measure and align is vital.
Experimenting with different materials can yield surprising results. Some vinyl types reflect light better than others, while textured surfaces can add depth. Don’t hesitate to try new combinations, even if they initially seem unorthodox. You might end up with a unique sticker that draws attention. Reflecting on your process helps improve your skills. Each attempt, whether a success or a miss, contributes to your growth as a creator.
Applying and Finishing Your Stickers for Maximum Impact
When applying vinyl cut stickers, precision is key. Clean the surface where you plan to place the sticker. Dirt and grease can hinder adhesion. Use rubbing alcohol to wipe the surface down. Ensure it is dry before application. A strong bond equals a better finish. You don’t want your sticker to peel or fade prematurely.
Consider the application process carefully. Use a squeegee to remove air bubbles. Start from the center and move outward. This technique helps in achieving a smooth finish. If bubbles persist, a small pin can help release trapped air. Be mindful; too much pressure may damage the sticker.
Finishing touches can elevate your design. A clear laminate can provide extra protection and gloss. It also enhances colors, making the sticker pop. Experiment with different finishes to see what suits your design best. Reflect on your techniques after each project. What worked well? What could be improved next time? Learning from each experience will refine your skills in creating stunning stickers.
How to Create Vinyl Cut Stickers that Stand Out?


 +86-15362608169